
Good Monday morning to you.After 3 great days with Madeline and a busy weekend I am ready for a nap, but that won't be happening today. I can't find the kitchen counter let alone the sink. It seems like I just did laundry and the blasted basket is full again. The garden needs picking and well there is dinner to be made. In between all of that I am hoping to take my camera for a walk.
After Madeline went home Saturday evening we just pretty much hung out and enjoyed the sunset making our way to bed pretty early. Sunday morning I woke to the tantalizing smell of cooking tomatoes. The dear husband had got an early start on preserving all the vegetables we had picked Friday evening from the garden. The tomatoes were all cooked down and ready to go into bags and into the freezer. I didn't have to lift a finger or even an eyelid to help. Thank you Dzia for being you.
To freeze egg plant they way we do it you will need time and patience. There are a lot of steps to this process. None of the steps are hard just time consuming. Since we have learned how to stream line it a little and cut the cooking time by baking it has gotten a little quicker to freeze egg plant but still time consuming just the same. I did get a few pictures of the process in between peeling slicing and dipping.
Step 1


Peel & slice the egg plant. I found out this year a vegetable peeler makes peeling much faster and easier than using a knife. Peeling fast is important because while I am peeling Dzia is using the deli slicer to slice the egg plant into lovely even slices about 1/4 inch thick.
Step 2
Salt the vegetables and lay out in single layers I used freezer paper to separate the layers. I have lots of freezer paper and no real use for it. Let the egg plant sit for 30 minutes. Rinse and pat dry.
Step 3
Make your dip mix. I use 1/2 cup butter milk ( made using 1 cup milk and 2 cap full of lemon juice, no worries you will use all the milk) 2 eggs. I whisk the eggs first and get them well beaten so there is no clingy white stuff hanging around then I add the milk and mix it real well. In another dish I put about 3 cups of bread crumbs and then I season the bread crumbs. For the egg plant I used basil, sage, oregano, and pepper. For the zucchini I added mint to the list. All the herbs were dried. It was the last of my 2013 crop. I dry my herbs whole and crush them as I need them. They stay fresher longer that way and the smell as you crush the leaves in you hand is just heavenly. You will have to re make the dip mixture a few times but it is better to make a little at a time. The bread crumbs get lumpy with each egg soaked veggie that goes in it and will eventually not cling to the vegetables and will need to be thrown out.If you make big batches of bread crumbs you end up wasting to much. The egg mixture does get bread crumby and yucky if you make to big of batches.
Step 4
Preheat the oven to 450
Step 5

Dip slices into egg mixture and then bread crumbs. Place the coated slices on parchment paper covered cookie sheets.
Step 6
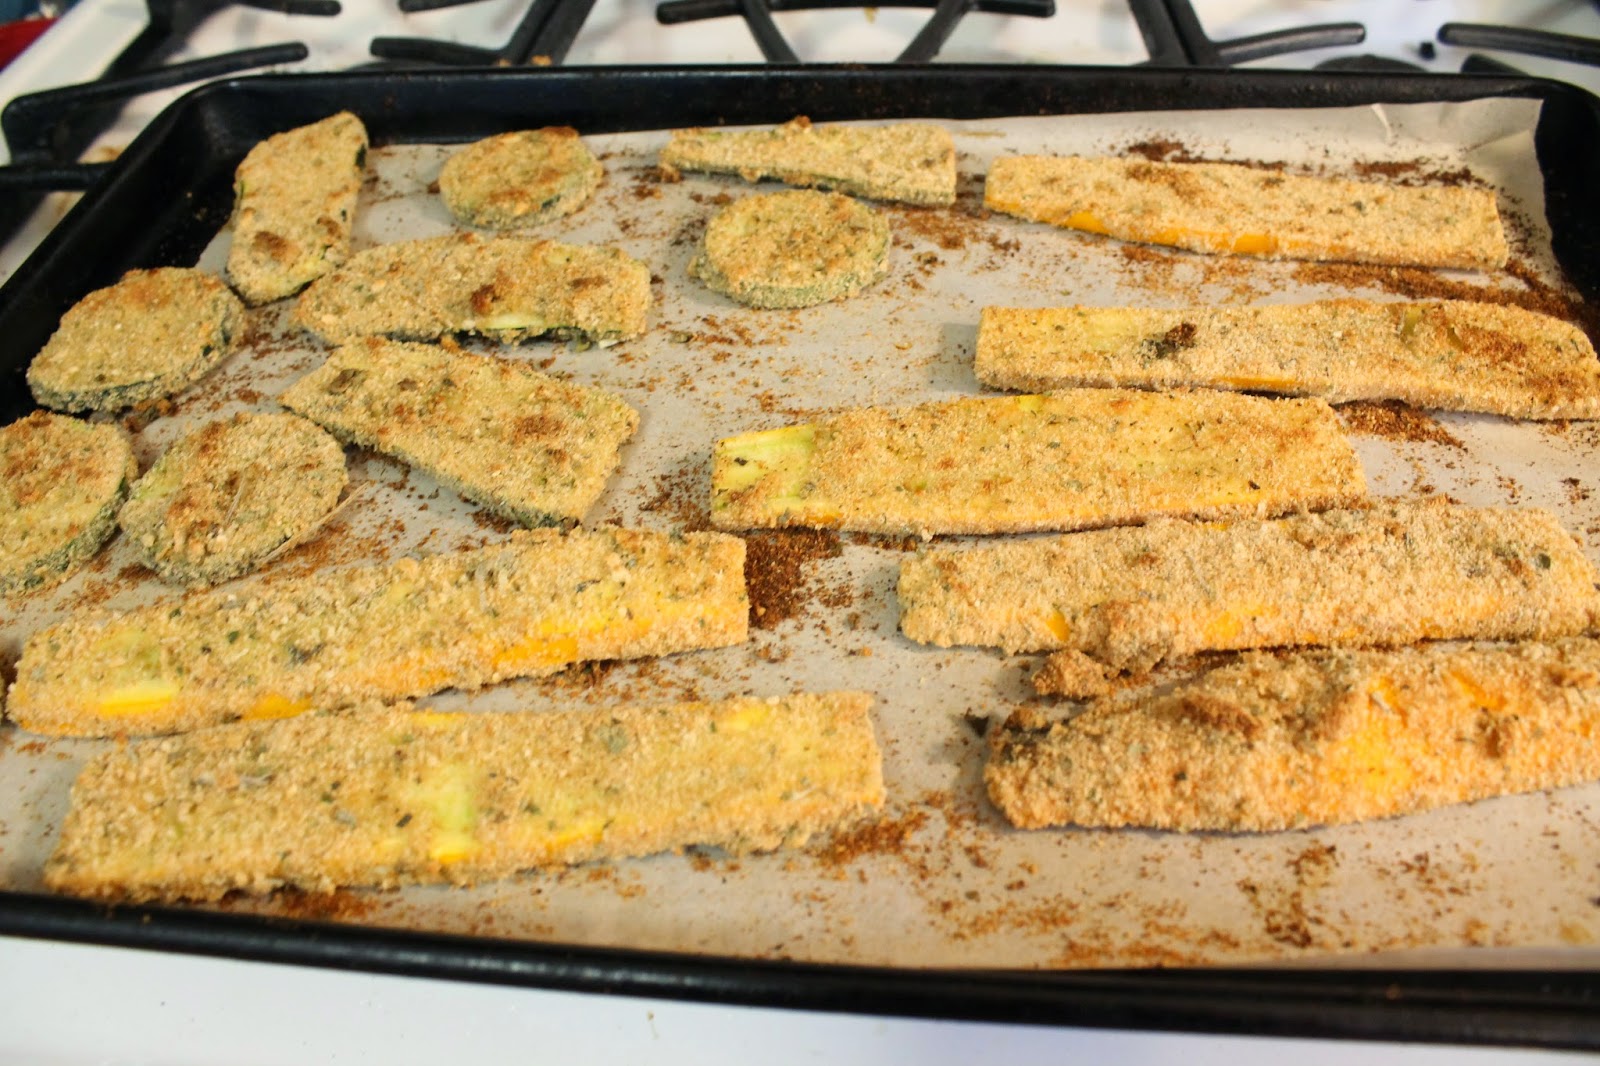
Place the first pan on the bottom rack and set timer for 7 minutes, if not brown enough on the bottom set timer for 3 more minutes, then flip the slices over. Set the timer for 3 minutes check them if they have a crispy crunch on the out side and tender on the inside remove them from the oven. If they seem a little limp set the timer for 3 more minutes. Be careful not to over cook, that will give you slimy instead of tender. I rotate my cookie sheets, once I remove the sheet on the bottom rack I drop the sheet that was on the top rack down and put the fresh pan on the top rack. It worked for me very nicely.
Step 7

Set on racks and let completely cool until cold.
Step 8

Bag in zip lock bags leaving a little air in the bag. I fill my bags with what I need for one dinner so I don't worry about them freezing together. To fill bags fuller and have them not freeze together lay out single layers on what ever is flat and fits you freeze use parchment or freezer paper on your flat surface. place them in the freeze until frozen and then bag them up.Once everything is all bagged up freeze and enjoy all winter long.

" What Was Dinner" It was lunch. I always talk about dinner because that is a meal I never miss. Lunch and breakfast however that a different story. I don't like to eat in the morning and I forget lots of times to eat lunch. About the time I realize I haven't eaten lunch it is just about dinner time so I wait for dinner.

When I do remember to eat lunch I like a warm lunch. My favorite lunch is grilled cheese and tomato soup. Something I haven't had in forever. I no longer eat canned soup and have yet to learn how to make my own tomato soup. Going to learn this year that is for sure. I have been enjoying a grilled cheese sandwich here and there. There are so many ways to make a grilled cheese sandwich, you have it plain ( The best way ) or you can add things like Bacon, ( 2nd Best ) ham, tomatoes ( yuck ) peppers, onions, even pepperoni. If you can think of it you can add it, but if you don't know how to make a grilled cheese sandwich correctly it won't matter what you add it will not be a good sandwich. I know what your thinking how can you mess up a grilled cheese. Well it is easier then you think. Too much cheese, not enough cheese, burnt, cheese not melted. All of these and more can ruin the best sandwich ever. Like the stars in the sky and the snow flakes in winter I doubt no 2 cooks make the Grilled Cheese Sandwich the same. Here is how I make mine.

2 slices of bread
4 1/2 slices american cheese ( sometimes I splurge and do 5)
1 tablespoon ish of butter
1 non stick frying pan ( ceramic is my choice)
Assemble the sandwich by placing the cheese between the 2 slices of bread. If I am adding to my sandwich I put the bacon or whatever it is in between the cheese.
Melt the butter in the frying pan.
Place the sandwich into the hot frying pan directly on top of the melted butter, quickly turn the sandwich over and slide around the pan to get the butter on the bread. Cook over medium heat watching carefully. Cook until the cheese is getting melty and the bread is golden brown and perfectly toasty, flip the sandwich and continue to cook. once the cheese is completely melted and the bread a warm golden brown remove from the heat and cut in half. Enjoy.

How do you make your grill cheese?
Cheery Monday to you! Thank you for stopping by.


We usually spread cream cheese on one slice of the bread and use 2 slices of whatever we have on hand. Right now, that would be smoked gouda and meunster. I like to use a couple of kinds of cheese and the cream cheese is my secret weapon. :)
ReplyDeleteI am going to try the cream cheese idea it sounds really good.
DeleteThis comment has been removed by the author.
ReplyDeleteYou are so Lucky to have such a wonderful garden bounty and a husband that helps with the cooking!
ReplyDeleteI feel lucky too. The garden is still giving and hubby is a good cook all around, but he rocks when it comes to making tomato sauce for freezing.
Delete